
Adding some texture to your card designs can come in many forms. Texture paste can add dimension and shine, as seen in this simplistic Christmas Holly Card.
We love this clean and simple Christmas card by our designer, Carol. This NEW Holly and Berries stencil has been selling out fast since the release date because its three layers make it so easy to create a clean and beautiful design. Today, Carol is showing us how to use texture paste to make our stencils cards shine. Follow along with the steps below to recreate this fun card!

How to make this card:
- To allow for drying time, we will complete the steps with texture paste first.
- Use a palette tool to thinly spread a red texture paste to cover most of an A2 sized piece of white cardstock. Use at least 80# cardstock. Try to spread it as smooth as possible. (We will die cut the sentiment from this later.)
- Set it aside to dry.
- Note: If you want to avoid using texture paste, you can skip the previous step and use a coordinating color of cardstock for the sentiment. I will give alternate steps in the directions below.
- Next we will use the 4213 Holly and Berries Stencil with 80# white cardstock.
- Place the stencil with the holly leaves over your cardstock.
- Use a Blending Brush to add Moss ink through the stencil to color the holly leaves. (Color Fuse #10)

- With the same Blending Brush add Clover ink mainly around the edges and at the base of the leaves. (I just did this fairly randomly with not much thought except to not cover the Moss ink too much.) Leave the stencil in place.
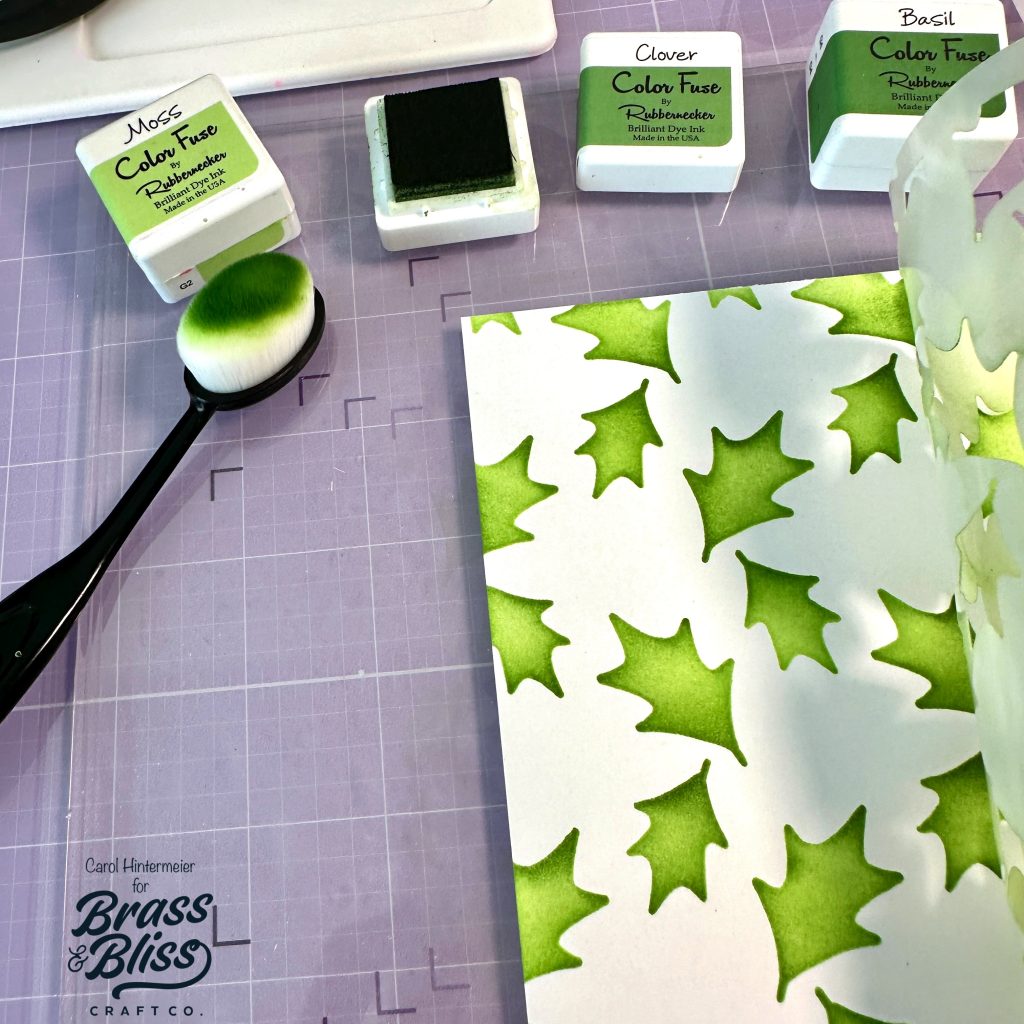
Next use a Detail Blending Brush to add Basil ink to the base of each holly leaf.

- Remove the holly stencil and position the stencil with the holly leaf veins over the panel.
- Using the Detail Blending Brush add more Basil ink to color the veins. I used a heavy hand to add this layer of ink. Leave this stencil in place.
- Using another Detail Blending Brush, add a black dye ink through to color the berry centers. Note: This will help us position the next stencil in the next step.

- Remove the stencil and position the third stencil with the berries over the panel.
- Using the same texture paste as we did first, spread the paste through the stencil to color the berries. (Note: As you can see, the black inked centers are covered, but we will fix that later.)
- Remove the stencil and set the piece aside to dry.
- Alternative: Use a Blending Brush to add red ink through the stencil.

NOTE: Proceed with the following steps after the texture paste pieces are totally dry. Skip these steps if you did not use texture paste.
- Place the stencil with the leaf veins over the dry panel.
- Use a Blending Brush to add the black dye ink (do not use pigment ink–it will not dry on the texture paste) through the stencil to add the centers to the berries.
- Die cut this piece with the largest 5719D Small Scallop with Holes Die.
- When the panel that we added texture paste to in the first step is totally dry, die cut the top layer of the 5515-12D Merry Christmas w/Shadow Die. Alternative: Die cut the sentiments from a coordinating red cardstock.
- Next die cut two more of “merry” and “Christmas” from white card stock.
- Use glue to adhere all of the layers together.
- Die cut the shadow from white cardstock and glue the sentiment to these.
- Cut a piece of vellum to 4-¼” x 2-¾”.
- Place the largest 5719D Small Scallop with Holes Die over the vellum strip and die cut it.


- Adhere the die cut 4213 Holly and Berries Stenciled panel to an A2 card base.
- Add tape runner to the back of the sentiments and adhere them to the die cut vellum strip.
- To adhere the vellum with sentiments to the card, add more tape runner to the back of the vellum. Make sure to add the tape just behind the sentiments so the adhesive will not show through the vellum.
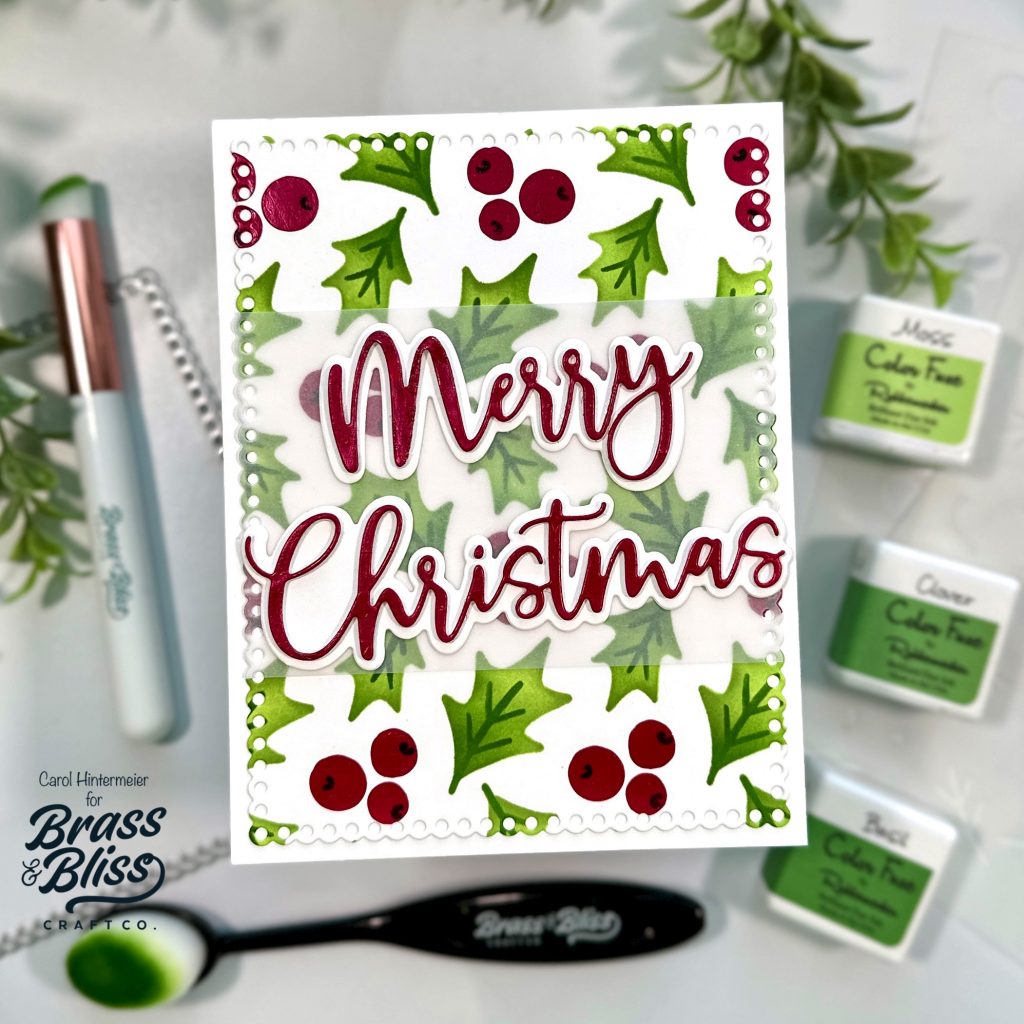
Wow. We adore how this card turned out. The shine on those berries and the Merry Christmas really brought this project to a new level. It’s these small details that make each card unique and really shine. If you loved this project, be sure to check out this stenciling video using this Holly and Berries Stencil for more ways to step up your stencil game. Happy Crafting!