
Line up those stencils like a pro and create a beautifully blended floral card!
Today’s project is an oldie that we wanted to reshare because of its amazing stenciling tips! Here in the month of August our theme is “Stenciled Creations”, so this post seemed like a great way to kick us off. Follow along as Carol gives us some pro tips on aligning our stencils for success!
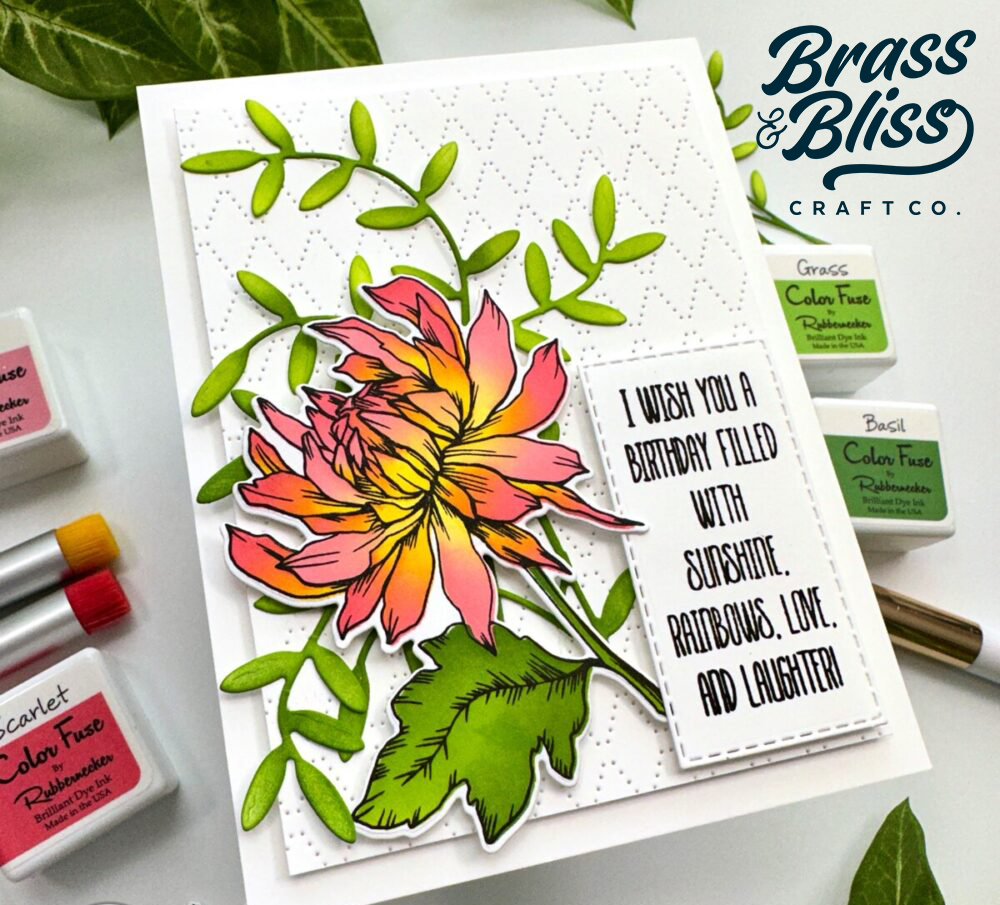
How to stencil the beautiful blossom from our Like a Wildflower Stencil set.
- Position the layer one of the 3496-07S Like a Wildflower Floral Coordinating Stencil over 80# Neenah white cardstock and secure with removable tape.*
- Use small ink blending brushes to first ink on Posey Color Fuse Ink from Set #4 beginning at the tips of the petals and inking about half of the petal. Leave the stencil in place.
- Wipe the Posey ink off of the stencil with a barely damp paper towel.
- Use another ink blending brush and add Lemon Color Fuse Ink from Set #1 to the base of each petal overlapping a bit of the Posey ink.
- Do not worry if you overlap into another petal as you are ink blending. That is what adds more interest to the flower!
- Repeat the steps for layers two and three on the stencil, and for as many flowers as you want.
- We will color the stem and leaves after we die cut the flowers. For some reason, I seem to not get the stem/leaf positioned correct if I stencil before die cutting. By waiting to color after die cutting, the leaf and stem are perfectly lined up!

- Die cut your stenciled flowers with 3496-07D Like a Wildflower Floral Coordinating Die.
- Keep one of the negative pieces from the die cutting.
- I use a sticky mat such as a cut up mat from a Cricut or Silhouette.
- Put the negative piece onto a sticky mat, or be sure to use some removable tape to get it placed onto your surface such that it doesn’t shift around.
- Place a die cut flower into the opening like this:

- Then position the leaf layer of the stencil over the flower. Use two long pieces of tape to create a “hinge” for the stencil.

- Ink on Basil Color Fuse Ink from Set #10 at the base of the leaf and top of the stem.
- Ink Grass Color Fuse Ink from Set #11 on the rest of the leaf and stem blending over the Basil ink.

- Fold the stencil back using the hinges to keep it in place.
- Remove the finished flower and place the next flower into the opening if you are making multiples. PRO TIP: Make extras when you have everything set up – use them for extra cards now or tuck them into your storage for the stencils for future use.
- Repeat the steps for each flower. SAVE the negative die cut piece for the next step.
Now, let’s get Carol’s steps for stamping our 3496-07 Like a Wildflower Floral- 4×6 Stamp Set onto the stenciled flowers:
- You need a MISTI or other type of stamp positioning tool.
- First I put the Like A Wildflower stamp onto the MISTI door.
- Secure a piece of printer paper either with the magnets or removable tape.
- Then ink it up with black ink and stamp onto the scrap piece of printer paper.
- LEAVE the stamp ON the stamping tool door.
- LEAVE the stamped image in place.
- Now get that die cut negative again and position it over your stamped flower.
- Once you have it centered, tape it down securely!
- Now you just place the die cut flowers, one by one, into the negative die cut, re-ink the stamp, and stamp the outline onto the die cut piece.
- The next four photos are a visual representation of these directions.
The stamped scrap paper in position:

Die cut negative is centered over the stamped image and secured with tape:

The stenciled flower placed into the negative opening over the stamped image on the scrap paper:
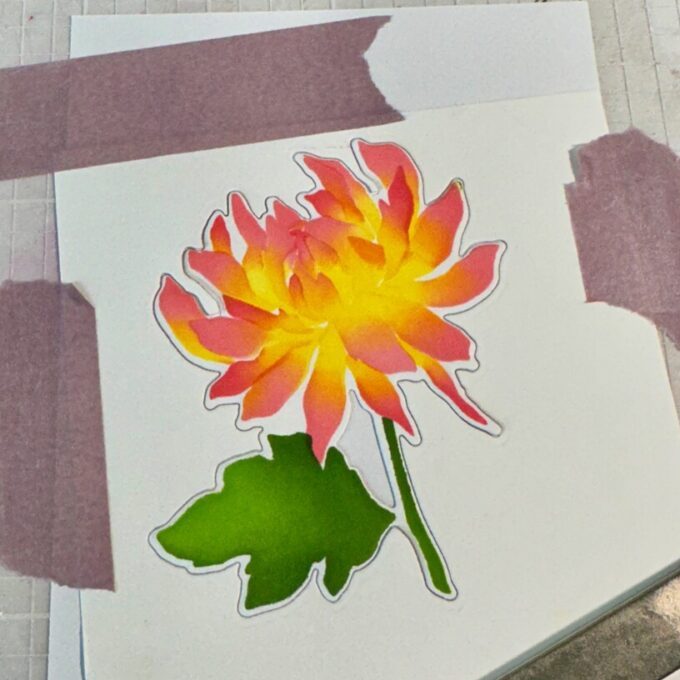
The flower after being stamped:

If you can collect yourself after seeing these spectacular results, let’s finish the card:
- Carol used the Diamond Pierced Cover Die for this card, but it’s unfortunate no longer available. We suggest this 5628D A2 Quilted Cover Die as a beautiful replacement. Die cut 80# Neenah with our Cover die. Trim the piece to 3-¾” x 5″.
- Add foam tape to the back to adhere to an A2 card base.
- The greenery that Carol used behind this floral is no longer available, but we suggest using the new 5611-04D Open Greenery #1 Die. Cut out two or three of them and arrange as necessary .
- Color these pieces with Grass and Basil inks with blender brushes.
- Stamp the sentiment from our Like A Wildflower set in black ink. Use the smallest 5013D Nested Rectangle Small Stitch Die Set to cut it out. It was a happy surprise that it is the perfect die for this sentiment!
- Add foam tape to the back of the sentiment and adhere in the lower right corner.
- Arrange the greenery pieces and adhere with glue. Snip off a branch or two, as needed, to tuck under the flower.
- Add foam tape to the flower to adhere.
We don’t about you all, but we are THRILLED to have all these directions and LOVE that Carol took the time to share this brilliant way to get everything lined up so beautifully with us! Be sure to follow us on Instagram for more inspiration and follow along the rest of the month for more stenciling inspiration.