
Today’s card features a fun window to peep into this Christmas scene. These Holiday “Inchies” are the sweetest characters for this fun and festive card.
Today our designer, Dominique, is bringing us this colorful and festive card that uses a fun stencil with some ink blending action, as well as a sweet peek-a-boo window to peep into the inside. Follow along as she shows us how to make a Christmas window card that really stands out!

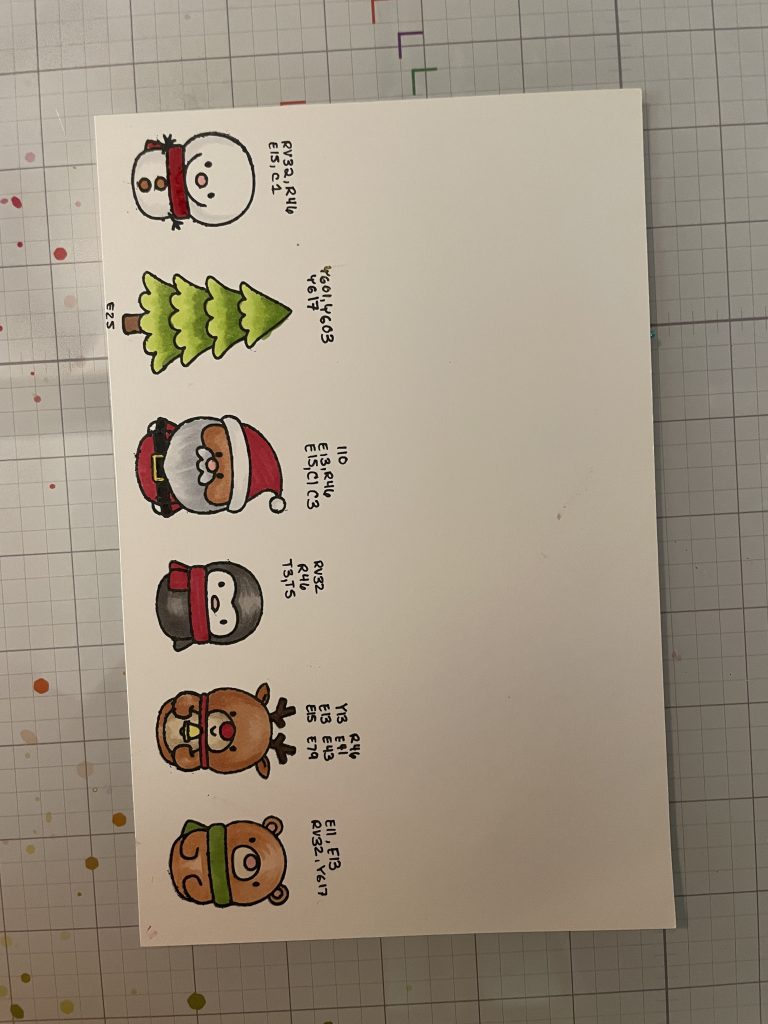
- First we are going to start with our coloring. We will be using the images from 3332 Christmas Inchies. Using a stamp positioner tool, such as the Misti, position all the inchies on a strip of paper. Then condition the stamp with a stamp conditioner. Next, stamp the images using a Copic friendly ink.
- Now it’s time to color the inchies. I used the following Copic colors: Snowman (RV32, R46, 515, C1), Christmas Tree (YG01, YG03, YG17), Santa (110, E13, E15, R46, C1, C3), Penguin (RV32, R46, T3, T5), Reindeer (Y13, R46, E41, E13, E43, E15, E79), Bear (E11, E13, RV32, YG17).
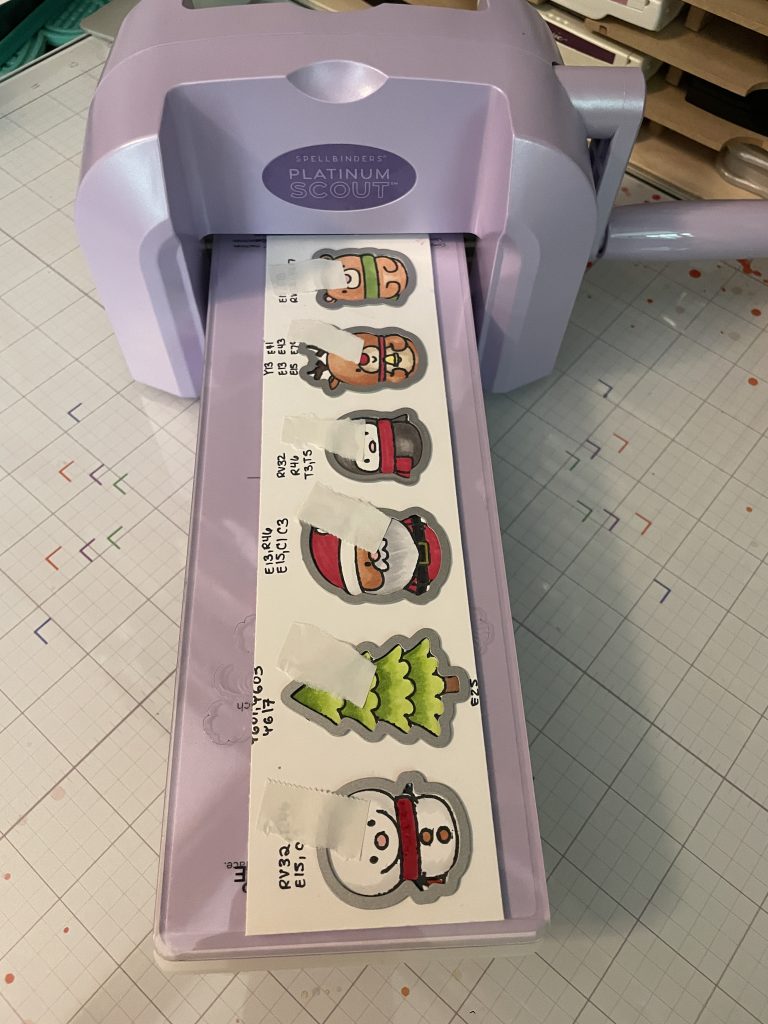
- Next, cut out the images with the coordinating die set, 3332D Christmas Iniches Die.
- Now, let’s move on to the front of the card. We are going to make a window card. Using a 4 1/4 by 5 1/2 card base, cut out a circle on the front panel using the largest circle die from 5527D Peek-a-Boo Triple Cover Die.
- Now we are going to stencil using 4123 Snowflake Stencil and Sapphire from Color Fuse Set #8. Tape the stencil to your card base and add a sheet a scrap paper on the inside behind the circle. This is to protect the inside of your card from being colored blue. Next, color your card using a medium to large blending brush. If you are in the market for new blending brushes, check out the Large Blending Brushes 4 Pack.
- Set the stencil to the side to be cleaned. (Crafter tip: I use rubbing alcohol and a microfiber cloth to clean my stencils and stamps. For me, the alcohol has been the best at removing ink stains.)
- Now, with your card closed. Lightly trace the circle. The goal is to be able to see where the opening of the circle lines up with the inside of your card. This is going to help with the placement of the inside stamped images.
- Next, we are going to create some masks for the inside image we will be stamping. Using a piece of masking paper, stamp the tree image. Then cut it out. I did this by hand because I did not what the small white space that is left when you cut using the coordinating die.
- Now, using a stamp block and the tree stamp from the set, stamp the far right tree onto the outer edge of the circle. Repeat on the right left side. Using your mask, cover up the far right tree. Then stamp another tree slightly over top of that. Repeat these steps on the far left side.
- Next, color your trees using the same colors are before. If you want more interest, color the inside of your card. I used Copic Y00 for this. Then stamp your inside message.
- Moving back to the first of the card, stamp your greeting.
- Using a ruler to help with placement, start to glue down your inchies in your desired location.
- Now, you can stop here if you would like. I initially did. However after I came back to this card the next day I felt like I needed a few more inchies in my forest. So, I took the left over penguin and bear and placed them on the inside of the card over top of trees. I then stamped, colored, and cut out one more additional tree to add in the middle. This was also placed on the inside of the card, but it was popped up on a bit of foam tape.
There you have it! A cute Christmas window card that your loved ones will be happy to recieve.



We love this project so much. This stencil is such an amazing holiday/winter craft staple and makes the most gorgeous snowflakes. We think Dominique did a fabulous job with this card, and hope you love it too. Be sure to follow us on Instagram and Pin this project for later.