
Make a Festive Gingerbread Card
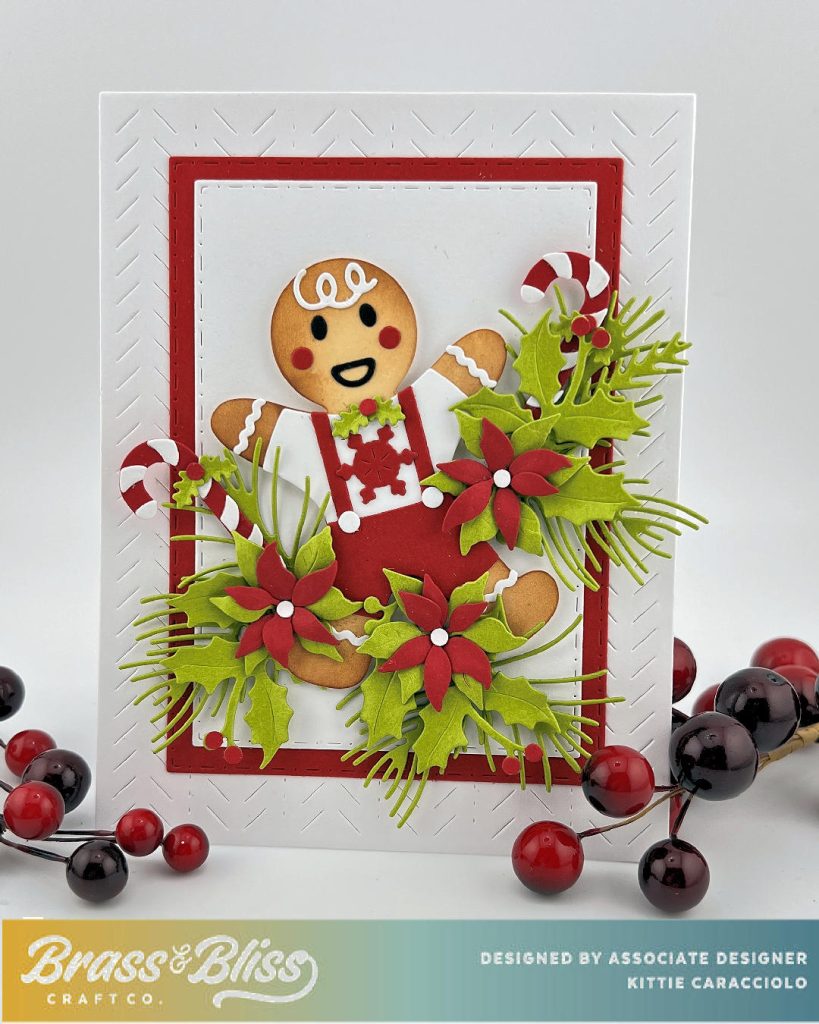
Today’s card design is from Kittie, who always makes paper look like a dream! This Gingerbread card is adorable and we just love his cute little outfit in classic reds and whites. Check out these steps to recreate this festive gingerbread card.

Card Base
- Create the layered card base using red and white cardstock.
- Apply double stick tape to the back of the stitched white layer and red layer and attach them to the card base.
- Apply strips of mounting tape to the smaller white layer and attach it to the red layer.
Gingerbread Boy
- Use vanilla cardstock to cut the gingerbread boy.
- Lightly shade the body with brown ink and blending brushes.
- Use red and white cardstock to cute the trim and clothing sections.
- Attach the sections to the boy using Nuvo glue. Pro Tip: Nuvo glue is perfect to attach small pieces because it dries clear.
- Apply pieces of mounting tape to the back of the boy and attach it to the card base.
Floral Embellishments
I thought my gingerbread themed card looked a little bare so I added flowers and greenery for a perfect finishing touch.
- Cut the poinsettia sections using red and green cardstock.
- Form the petals using a small round stylus and molding pad and attach them together using glue.
- Attach the flowers around the gingerbread boy’s body using glue.
- Cut evergreen and holly sections using green cardstock.
- Tuck the branches under the poinsettia flowers and attach them using glue.
Here are the products used: Stitched Dot Nested Rectangle, Background Cover, Build a Bloom Poinsettia #4, Pine Bough Set, Holly #1, Winter Cocoa, Tiny Leaves.