
Make a colorful vintage flower cart card using the newly released Brass and Bliss Wrought Iron Cart Set.
Today’s beautiful card inspiration is from our Associate Designer Kittie. Her papercrafting skills are top notch and we love the dimensional scenes she is able to create. Kittie said, “It is no secret that I love making dimensional die cut scene cards and this vintage flower cart card is one of my favorites. I love how all the colorful flowers and foliage pop against the white background.” She’s right, it does POP! Follow along to see how you can create a similar card in your own craft room!
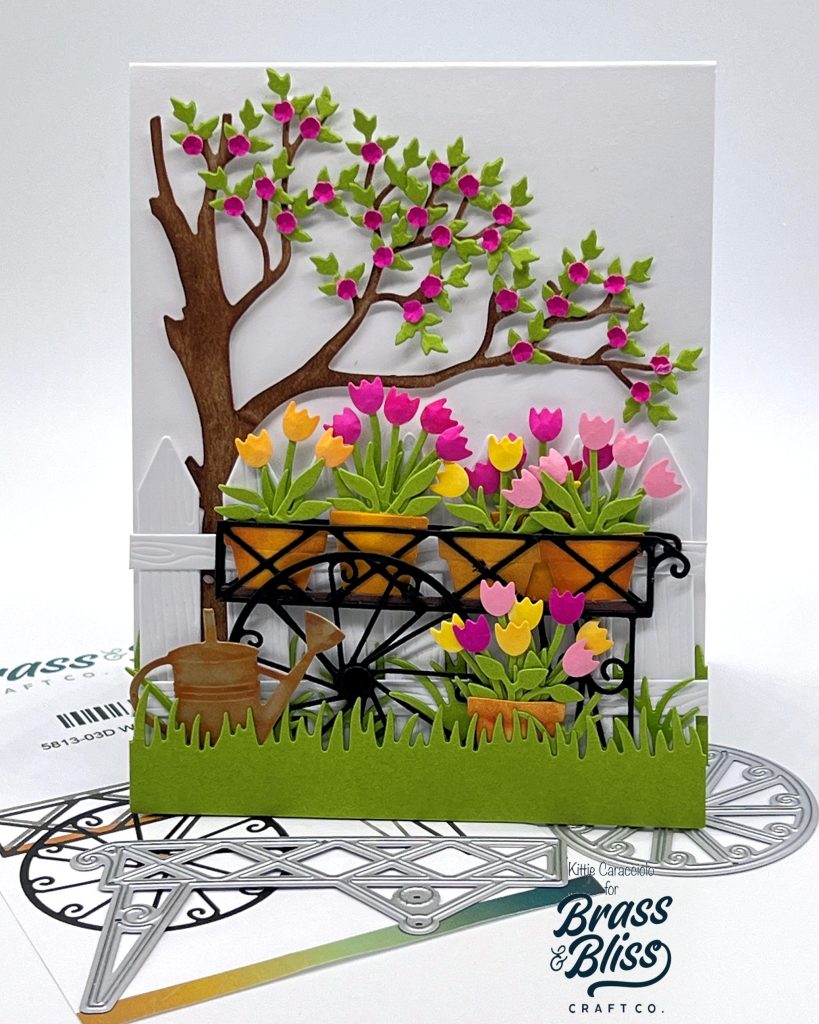
Scene Elements
- Use white cardstock to cut the A2 sized card base.
- Cut the tree using Kraft cardstock and color using brown ink and a wet baby wipe. Pro Tip: Using a wet baby wipe to apply color to a large section like the tree is so much easier than using a marker or blender brush.
- Cut the leaves and tiny flowers and attach them to the tree branches using Nuvo adhesive.
- Apply tiny pop dots to the back of several leaves and a thin strip of mounting tape to the back of the upper trunk and attach to the card base.
- Cut the fence and attach it to the card base. Pro Tip: I apply pop dots to the top back of the pickets and double stick tape to the back bottom of the fence to attach. The pop dots allow the pickets to stand away from the base for dimension and the tape allows the fence bottom to be flat and out of the way for attaching the grass.
- Cut a grass section and attach it to the fence front using a strip of mounting tape.
Cart and Potted Tulips
- Cut the cart sections and attach them together using Nuvo adhesive.
- Use yellow cardstock to cut several terracotta pots and apply orange and brown ink to create the terracotta color.
- Cut several tulip sections and color using pink, yellow and fuchsia ink.
- Attach the tulips to green stems, arrange and attach the stems to the back of the pots using Nuvo adhesive.
- Adhere the pots to the back of the cart with adhesive, tuck the cart in behind the grass and attach it to the card base.
- Tuck an additional pot of tulips and a watering can behind the grass to finish the card.

Wrought Iron Cart, Wooden Fence, Half Tree, Spring Garden Starter, Spring Tulip Starter, Leaves and Greenery, Tiny Leaves #2, Grass #2, Classic Grass, Detailed Blending Brushes, Color Fuse Ink Set 5, Color Fuse Set 1, Color Fuse Set 4, Color Fuse Set 2, Color Fuse Set 3, Precision Glue Press