
If you are into unique “folds” for your handmade greeting cards, this ‘Spanner Panel’ Card is for you.
We truly love our designer Kendra and her fondness for creating cards with interesting folds as part of their design. Today she has a Spanner Panel Card to share, and we just know you are going to love it! Because the month of November is dedicated to “Thank You” cards, this note of gratitude is the perfect addition to our monthly inspiration and we hope you love it as much as we do! Follow the steps below to recreate this fun new fold project!

- Kendra started her card by creating an A2 sized card base, sized 5.5″x4.25″.
- Open the card and cut in 1.25” from the left and right edge of the top half, stopping at the center fold.
- Embellish inside of card first! Cut a piece of light green paper from’2001 Autumn Leaves‘, 5.25″ x 4″. Cut a piece of white cardstock 5″ x 3.75″. Adhere together. Cut two pieces of yellow and white striped pattern paper from ‘2005 Harvest Time‘, .5″ x 4″. Adhere to each side of layer about to your liking.
- Stamp the ‘Thanks for always being so wonderful’ sentiment from the ‘36057 Thank You‘ stamp set in black ink. Stamp two of the smaller rose images from ‘36034 Ruffled Flower Bouquet‘ in autumn ink from ‘Color Fuse Set #1‘ around the sentiment. Adhere to inside of card.
- Fold center flap down. Cut a piece of yellow and white striped pattern paper from ‘2005 Harvest Time‘, 2 15/16″ x 4″. Stamp the ‘A note of thanks and Gratitude’ sentiment from the ‘36057 Thank You‘ stamp set in black ink near upper right corner. Stamp ‘You are the Best’ in black ink near bottom left. Adhere to center panel.
- Fold end panels down. Cut two pieces of light green and white polka dot paper from ‘2001 Autumn Leaves‘, 1″ x 4″. Adhere to side panels.
- Cut a piece of white cardstock 5.5″ x 1.5″. Cut a piece of triangle checked pattern paper from ‘2005 Harvest Time‘, 5.5″ x 1.25″. Adhere layers together. Flip end flaps up and flip card around, lay on table. Adhere layer about .25″ from bottom of flaps, only adding adhesive to the side flaps only. Flip flaps back down.
- Stamp the large rose image from the ‘36034 Ruffled Flower Bouquet‘. Color with color medium of your choice. Die cut with coordinating ‘36034D Ruffled Flower Bouquet Coordinating Die‘. Adhere to card base, again only adding foam mounting tape to adhere image to left and bottom panel. (It can help to carefully place the image and lift the end flaps up and mark the backside of the image with a pencil lightly, so you know where to add tape)
- Finish card by adding enamel dots.


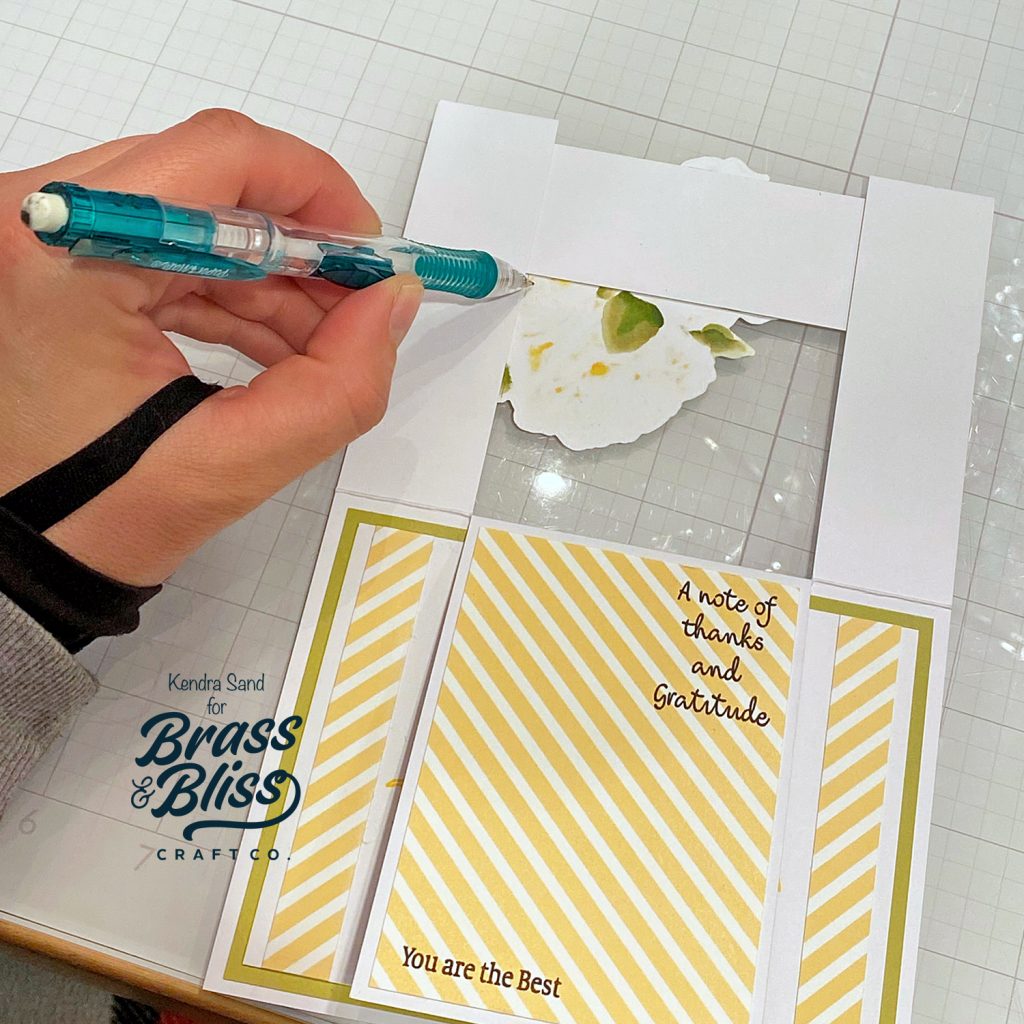
We love how the steps are shows so well with photos. It really helps make sure you are getting the fold just right!


Wow! What a truly stunning project. We love how this Spanner Panel Card turned out. Such an interesting way to cut and fold your cards for a little something extra! Be sure to pin this card for future use, and tag us in your creations on Instagram.
If you are interested in other cards that use fun folds, check out these projects:
- https://blog.brassandbliss.com/how-to-use-the-impossible-fold-die-to-make-a-thanksgiving-table-placeholder/
- https://blog.brassandbliss.com/how-to-make-a-halloween-pop-up-card/
- https://blog.brassandbliss.com/how-to-make-a-twist-gate-fold-card-for-fall/
- https://blog.brassandbliss.com/pillar-fold-card-idea-for-dad/